¶ Windows 11/10 Errors
¶ KERNEL_SECURITY_CHECK_FAILURE BSOD
Cause: This BSOD occurs when Windows detects that a core kernel data structure has been corrupted. A common culprit is corrupted hardware drivers (very frequently Bluetooth
.sysfiles) mishandling system memory.
Step 1: Repair Corrupted System Files
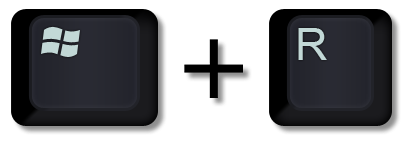
- Type
cmd, press Ctrl + Shift + Enter to run as Administrator. - Run the System File Checker:
sfc /scannow
- (Optional) Check the logs to verify exactly which files were corrupted/repaired:
findstr /c:"[SR]" %windir%\Logs\CBS\CBS.log > "%userprofile%\Desktop\sfcdetails.txt"
- Check the text file on the desktop. Look for system drivers like
BthA2dp.sys,BthHfEnum.sys, orbthmodem.sys.
Step 2: Update Drivers to Prevent Recurrence
- Restart the computer to ensure the cleanly repaired
.sysfiles are loaded into memory. - Press Windows Key + X and select Device Manager.
- Expand the Bluetooth category.
- Right-click the main Bluetooth adapter (e.g., Intel, Realtek, Generic) and select Update driver.
(Note: Downloading the latest driver directly from the motherboard or laptop manufacturer's website is highly recommended).
¶ BAD SYSTEM CONFIG INFO
Insert the Windows usb install media
bootrec /fixmbr
bootrec /fixboot
bootsect /nt60 sys
bootrec /fixboot
bcdedit /export c:\bcdbackup
attrib c:\boot\bcd -h -r -s
ren c:\boot\bcd bcd.old
bootrec /rebuildbcd
y
exit
¶ Black screen with mouse
Option 1: Release all of the residual power
For Laptop
Take out battery and hold the power button for 30 seconds
For Desktop
Take out the power cable then hold the power button for 30 seconds
Option 2:
WINDOWS KEY + P
Option 3: Unistall graphics card
-
Ctrl + Shift + Esc
-
Run new task
devmgmt.msc
- Go to Display adapters and Unistall the graphics card
Option 4: Unistall graphics card via safe mode with networking
-
Go to safe mode with networking
-
devmgmt.msc
- Go to Display adapters and Unistall the graphics card
¶ Windows install error autounattend
The computer restarted unexpectedly or encountered an unexpected error. Windows installation cannot proceed. To install Windows, click OK to restart the computer and then restart the installation
Windows could not complete the installation. To install Windows on this computer, restart the installation
-
Open CMD with: SHIFT + F10
-
Run the following commands to check the logs
notepad C:\Windows\Panther\setuperr.log
notepad C:\Windows\Panther\setupact.log
¶ Windows Upgrade Error: Failed to backup BCD (0xc00000bb)
Symptoms: Windows 11 Upgrade fails, rolls back to the previous OS, and often shows a generic error code like
0x80004005in the GUI.
¶ 1. Diagnosis
Open the setup logs to confirm the specific error.
- Press Windows Key + R, type
cmd, and run:
notepad C:\$WINDOWS.~BT\Sources\Panther\setupact.log
- Search (Ctrl+F) for
Failed to backup BCD. If you see the following lines, follow the solution below:
Error IBSLIB OSRollbackService::CBootFilesRestoreCheckpoint::Finalize: Failed to backup BCD database
Status: c00000bb
- Verify the cause by running this in Admin CMD:
bcdedit /enum {bootmgr}
- Corrupt/Ghost State:
device partition=F:(or G:, etc.) - Healthy State:
device partition=\Device\HarddiskVolume...
If the device points to a specific Drive Letter instead of a Device Path, the installer cannot lock the volume exclusively.
¶ 2. Solution: Recreate EFI Partition (The "Nuclear" Fix)
Since registry scrubbing often fails to remove the "ghost" drive letter assignment, the only reliable fix is to delete the EFI partition and recreate it. This generates a new Partition ID, forcing Windows to forget the old drive letter.
Warning: This process involves deleting the boot partition. Do not reboot the computer halfway through, or it will not boot.
¶ Step A: Boot into Recovery
- Create a Windows Install USB or enter Windows Recovery Environment (Shift + Restart > Troubleshoot > Advanced > Command Prompt).
- Open Command Prompt.
¶ Step B: Identify Partitions
Drive letters change in Recovery Mode. We must identify the correct drives.
diskpart
list volume
- Note the System Volume: Look for the small (~100MB) FAT32 volume. (Let's call this Volume S).
- Note the Windows Volume: Look for your main OS partition size. (Let's call this Volume W).
¶ Step C: Delete and Recreate EFI
Replace X with the correct disk number and S with the EFI volume number found above.
select disk X
select volume S
delete partition override
create partition efi
format quick fs=fat32 label="System"
assign letter=S
exit
Note: Do not specify
size=100. Usingcreate partition efiwithout a size will automatically fill the exact gap left by the deleted partition.
¶ Step D: Restore Boot Files
You must determine which letter is assigned to your Windows folder now (it might be D: or E: in recovery mode).
dir C:\Windows
dir D:\Windows
(Run this until you find the drive containing the Windows folder).
Run the repair command (replace D: with your actual Windows drive letter):
bcdboot D:\Windows /s S: /f UEFI
¶ Step E: Cleanup and Reboot
Unmount the temporary drive letter to ensure a clean state.
diskpart
select volume S
remove letter=S
exit
Restart the computer. Windows will now see the EFI partition as a fresh system device with no ghost drive letters attached. Run the Windows 11 Upgrade installer immediately.
¶ Secure Boot Violation: Unauthorized Changes (Windows 11)
Symptom: When booting or installing Windows 11 with Secure Boot enabled, you get a red box stating: Secure Boot Violation - The system found unauthorized changes on the firmware, operating system or UEFI drivers.
Cause: Microsoft updated the Windows 11 bootloader to use a new "2023" certificate. Many motherboards (especially from 2018-2022) only contain Microsoft's old "2011" certificates in their factory defaults. Because the keys mismatch, the motherboard assumes Windows is a virus and blocks it.
¶ Step 1: Prepare the 2023 Certificates
You must download the new raw certificates directly from Microsoft and put them on a USB drive.
- Format a USB drive to FAT32 (NTFS/exFAT will not work in the BIOS).
- Download these three official Microsoft Certificates:
- DB Certificate: Windows UEFI CA 2023 (Save as
db2023.crt) - KEK Certificate: Microsoft Corp KEK 2K CA 2023 (Save as
kek2023.crt) - 3rd Party DB: Microsoft 3rd Party UEFI CA 2023 (Save as
db3rdparty.crt)
- DB Certificate: Windows UEFI CA 2023 (Save as
or download from our local storage (incase the links has expired)
- Put all three
.crtfiles onto the root of your FAT32 USB drive.
¶ Step 2: Inject the Keys into the BIOS
Insert the USB drive into the affected PC, turn it on, and press DEL or F2 to enter the BIOS.
Important: Ensure you are in "Advanced Mode" (usually F7) and that you have first clicked "Restore Factory Keys" or "Install Default Secure Boot Keys" to populate your base variables before appending the new ones!
For ASUS Motherboards:
- Go to Boot -> Secure Boot -> Key Management.
- Click KEK Management -> Append Key -> Select USB -> Select
kek2023.crt(Format: Public Key Certificate). - Click DB Management -> Append Key -> Select USB -> Select
db2023.crt. - Click DB Management -> Append Key -> Select USB -> Select
db3rdparty.crt. - Go back to the main Secure Boot menu and change OS Type to Windows UEFI Mode.
For Gigabyte Motherboards:
- Go to Boot -> Secure Boot -> Key Management.
- Select KEK -> Append -> Select USB -> Select
kek2023.crt. - Select Authorized Signatures (DB) -> Append -> Select USB -> Select
db2023.crt. - Select Authorized Signatures (DB) -> Append -> Select USB -> Select
db3rdparty.crt.
For MSI Motherboards:
- Go to Security -> Secure Boot -> Key Management.
- Ensure Secure Boot is set to Custom.
- Select KEK -> Enroll -> Select USB -> Select
kek2023.crt. - Select DB -> Enroll -> Select USB -> Select
db2023.crt. - Select DB -> Enroll -> Select USB -> Select
db3rdparty.crt.
¶ Step 3: Save and Reboot
- Press F10 to Save Changes & Reset.
- Windows 11 will now successfully verify the signature and boot normally with Secure Boot fully enabled!
¶ Powershell script checker
Use our powershell script to check the secure boot state
- Save as:
secure_boot_checker.ps1
# Requires Run as Administrator
$isAdmin = ([Security.Principal.WindowsPrincipal][Security.Principal.WindowsIdentity]::GetCurrent()).IsInRole([Security.Principal.WindowsBuiltInRole]::Administrator)
if (-not $isAdmin) {
    Write-Host "ERROR: This script must be run as Administrator." -ForegroundColor Red
    Write-Host "Right-click PowerShell and select 'Run as Administrator'." -ForegroundColor Yellow
    return
}

function Get-UEFICertInfo {
    param ([string]$Name)
    try {
        $var = Get-SecureBootUEFI -Name $Name -ErrorAction Stop
        if ($null -ne $var) {
            return @{
                Size = $var.Bytes.Length
                Content = [System.Text.Encoding]::ASCII.GetString($var.Bytes)
                Found = $true
            }
        }
    } catch {
        return @{ Found = $false; Size = 0; Content = "" }
    }
    return @{ Found = $false; Size = 0; Content = "" }
}

function Show-BiosTutorial {
    Write-Host ""
    Write-Host "==========================================================" -ForegroundColor Cyan
    Write-Host " BIOS PREPARATION TUTORIAL" -ForegroundColor Cyan
    Write-Host "==========================================================" -ForegroundColor Cyan
    Write-Host "Follow these steps EXACTLY in this order:"
    Write-Host ""
    Write-Host "STEP 1: Prepare BIOS in Windows" -ForegroundColor Yellow
    Write-Host "  1. Restart PC, press DEL or F2 to enter BIOS."
    Write-Host "  2. Go to Boot -> Secure Boot -> Key Management."
    Write-Host "  3. Click 'Restore Factory Keys' or 'Install Default Secure Boot Keys'."
    Write-Host "  4. Set OS Type to 'Other OS' or 'Custom' (So Windows can boot temporarily)."
    Write-Host "  5. Save & Exit (F10). Boot into Windows."
    Write-Host "  6. Run THIS PowerShell script again."
    Write-Host ""
    Write-Host "STEP 2: Run This Script (Automated Fix)" -ForegroundColor Yellow
    Write-Host "  1. When the script asks, type 'Y' to apply the Windows 2023 Cert Update."
    Write-Host "  2. Let the script verify the 2023 certs are written to your motherboard."
    Write-Host ""
    Write-Host "STEP 3: Final BIOS Enablement" -ForegroundColor Yellow
    Write-Host "  1. Restart PC, enter BIOS again."
    Write-Host "  2. Change OS Type to 'Windows UEFI Mode' (or 'Standard')."
    Write-Host "  3. Save & Exit (F10). Windows will now boot with Secure Boot ON."
    Write-Host "==========================================================" -ForegroundColor Cyan
    Write-Host ""
}

Write-Host "==========================================" -ForegroundColor Cyan
Write-Host " Ultimate Secure Boot Checker & Fixer" -ForegroundColor Cyan
Write-Host "==========================================" -ForegroundColor Cyan

# 0. Check Current Secure Boot Status in Windows
Write-Host "`n[0] Checking Current Secure Boot Status..." -ForegroundColor Yellow
$global:SecureBootEnabled = $false
try {
    $global:SecureBootEnabled = Confirm-SecureBootUEFI
    if ($global:SecureBootEnabled) {
        Write-Host "    [ON] Secure Boot is currently ENABLED in Windows." -ForegroundColor Green
    } else {
        Write-Host "    [OFF] Secure Boot is currently DISABLED in Windows." -ForegroundColor Red
    }
} catch {
    Write-Host "    [ERROR] Secure Boot is unsupported or PC is booting in Legacy/CSM Mode." -ForegroundColor Red
}

# 1. Check if Keys are Cleared (Setup Mode)
Write-Host "`n[1] Checking Motherboard Key State..." -ForegroundColor Yellow
$pk  = Get-UEFICertInfo -Name "PK"
$kek = Get-UEFICertInfo -Name "KEK"
$db  = Get-UEFICertInfo -Name "db"
$dbx = Get-UEFICertInfo -Name "dbx"

Write-Host "    -> Platform Key (PK):    $($pk.Size) bytes" -ForegroundColor Gray
Write-Host "    -> Key Exchange (KEK):   $($kek.Size) bytes" -ForegroundColor Gray
Write-Host "    -> Signature DB (db):    $($db.Size) bytes" -ForegroundColor Gray
Write-Host "    -> Revocation DB (dbx):  $($dbx.Size) bytes" -ForegroundColor Gray

if ($pk.Size -eq 0) {
    Write-Host "    [FAIL] Platform Key (PK) size is 0." -ForegroundColor Red
    Write-Host "    Your keys are CLEARED. Windows cannot update the firmware in this state." -ForegroundColor White
    Show-BiosTutorial
    return
} else {
    Write-Host "    [PASS] Default Keys are installed. Windows can proceed." -ForegroundColor Green
}

# 2. Check for 2023 Certificates
Write-Host "`n[2] Checking for 2023 Certificates in Firmware..." -ForegroundColor Yellow
$kekHas2023 = $kek.Content -match 'Microsoft Corporation KEK 2K CA 2023'
$dbHasWin2023 = $db.Content -match 'Windows UEFI CA 2023'

if ($dbHasWin2023 -and $kekHas2023) {
    if ($global:SecureBootEnabled) {
        Write-Host "    [SUCCESS] 2023 Certificates are present and Secure Boot is fully ACTIVE!" -ForegroundColor Green
        Write-Host "    No further action is required. Your system is fully secured." -ForegroundColor Cyan
    } else {
        Write-Host "    [SUCCESS] 2023 Certificates are ALREADY present in your firmware!" -ForegroundColor Green
        Write-Host "    You are ready to enable 'Windows UEFI Mode' (Secure Boot) in your BIOS." -ForegroundColor Cyan
    }
    return
} else {
    Write-Host "    [FAIL] 2023 Certificates are MISSING." -ForegroundColor Red
    if (-not $kekHas2023) { Write-Host "           -> Missing: Microsoft KEK 2K CA 2023" -ForegroundColor Red }
    if (-not $dbHasWin2023) { Write-Host "           -> Missing: Windows UEFI CA 2023" -ForegroundColor Red }
}

# 3. Apply the Fix
Write-Host "`n[3] Automated Fix Application" -ForegroundColor Yellow
Write-Host "    The script will now tell Windows to push the 2023 certs to your motherboard." -ForegroundColor White
$choice = Read-Host "    Do you want to apply the fix now? (Y/N)"

if ($choice -imatch "Y") {
    Write-Host "    Applying Registry Flag..." -ForegroundColor Gray
    reg add "HKLM\SYSTEM\CurrentControlSet\Control\Secureboot" /v AvailableUpdates /t REG_DWORD /d 0x100 /f | Out-Null
    if ($LASTEXITCODE -eq 0) { Write-Host "    [PASS] Registry flag set successfully." -ForegroundColor Green }
    else { Write-Host "    [FAIL] Failed to set registry key." -ForegroundColor Red; return }

    Write-Host "    Triggering Secure Boot Update Task..." -ForegroundColor Gray
    Start-ScheduledTask -TaskName "\Microsoft\Windows\PI\Secure-Boot-Update"

    Write-Host "    Waiting 5 seconds for task to complete..." -ForegroundColor Gray
    Start-Sleep -Seconds 5

    $taskInfo = Get-ScheduledTaskInfo -TaskName "\Microsoft\Windows\PI\Secure-Boot-Update"
    if ($taskInfo.LastTaskResult -eq 0) {
        Write-Host "    [PASS] Scheduled Task completed successfully." -ForegroundColor Green
    } else {
        Write-Host "    [FAIL] Scheduled Task failed with code: $($taskInfo.LastTaskResult)" -ForegroundColor Red
        Write-Host "    You may need to update your BIOS or manually inject the keys." -ForegroundColor White
        return
    }
} else {
    Write-Host "    Fix aborted by user." -ForegroundColor Yellow
    return
}

# 4. Final Verification
Write-Host "`n[4] Final Verification - Re-reading Motherboard Firmware..." -ForegroundColor Yellow
$kek2 = Get-UEFICertInfo -Name "KEK"
$db2 = Get-UEFICertInfo -Name "db"

$kek2Has2023 = $kek2.Content -match 'Microsoft Corporation KEK 2K CA 2023'
$db2HasWin2023 = $db2.Content -match 'Windows UEFI CA 2023'

if ($db2HasWin2023 -and $kek2Has2023) {
    Write-Host "    [SUCCESS] 2023 Certificates are now successfully installed in the firmware!" -ForegroundColor Green
    Write-Host "`n==========================================" -ForegroundColor Green
    Write-Host " MISSION ACCOMPLISHED" -ForegroundColor Green
    Write-Host "==========================================" -ForegroundColor Green
    Write-Host "Your motherboard now has the correct 2023 keys." -ForegroundColor White
    Write-Host "Final Step: Reboot into BIOS, change OS Type to 'Windows UEFI Mode'." -ForegroundColor White
    Write-Host "Windows 11 will boot normally with Secure Boot fully enabled." -ForegroundColor White
} else {
    Write-Host "    [FAIL] The 2023 Certificates are STILL MISSING." -ForegroundColor Red
    Write-Host "`n==========================================" -ForegroundColor Red
    Write-Host " TROUBLESHOOTING REQUIRED" -ForegroundColor Red
    Write-Host "==========================================" -ForegroundColor Red
    Write-Host "The task ran but the firmware rejected the update. This usually means:" -ForegroundColor White
    Write-Host "1. Your BIOS version is too old to accept the automatic Windows update." -ForegroundColor White
    Write-Host "2. You must MANUALLY append the Microsoft 2023 .crt files in your BIOS." -ForegroundColor White
}
Write-Host "==========================================" -ForegroundColor Cyan
¶ Reset Windows password
¶ Method 1 - NTPWEdit
-
Download Hiren's BootCD PE --> https://www.hirensbootcd.org/files/HBCD_PE_x64.iso
-
Download Rufus --> https://github.com/pbatard/rufus/releases/download/v3.20/rufus-3.20p.exe
-
Insert USB stick
Start Menu --> Security --> Passwords --> NT Password Edit
¶ Method 2 - Ophcrack (ADVANCED!)
Run this method only if all other methods have failed.
-
Download Parrot Security Edition --> https://download.parrot.sh/parrot/iso/5.0.1/Parrot-security-5.0.1_amd64.iso
-
Download Rufus --> https://github.com/pbatard/rufus/releases/download/v3.20/rufus-3.20p.exe
-
Insert USB stick
Windows key + E (to open file explorer)
Go to the HDD where Windows is installed
Right Click --> Open in Terminal
cd Windows/System32/config
cp SAM SYSTEM /home/user/Desktop
Close the terminal and go to the desktop
Right Click --> Open in Terminal
samdump2 SYSTEM SAM -o windowskey.txt
ophcrack
Download tables --> http://sourceforge.net/projects/ophcrack/files/tables/Vista free/tables_vista_free.zip/download
¶ Windows commands
¶ Advanced Boot Options
shutdown /r /o
¶ Basic system repair
DISM.exe /Online /Cleanup-image /Scanhealth
DISM.exe /Online /Cleanup-image /Restorehealth
DISM.exe /Online /Cleanup-image /startcomponentcleanup
sfc /scannow
¶ Reset Internet
netsh int ip reset reset.txt
netsh winsock reset
netsh advfirewall reset
ipconfig /flushdns
¶ Force restart Windows:
wmic os where Primary='TRUE' reboot
¶ Delete a Recovery Partition
diskpart
list disk
select disk (nummer die je moet hebben)
list partition
select partition INSERTNUMBERFROMLISTPARTITION
delete partition override
¶ Edit Environment Variables
rundll32.exe sysdm.cpl,EditEnvironmentVariables
¶ Microsoft Store
¶ Uninstall Microsoft Store
-
-
This command will start powershell as admin
powershell.exe -Command "Start-Process powershell.exe -Verb RunAs"
- This command will uninstall Microsoft Store
Get-AppxPackage -allusers *WindowsStore* | Remove-AppxPackage
¶ Install Microsoft Store
-
-
This command will start powershell as admin
powershell.exe -Command "Start-Process powershell.exe -Verb RunAs"
- This command will install Microsoft Store
Get-AppxPackage -AllUsers Microsoft.WindowsStore* | Foreach {Add-AppxPackage -DisableDevelopmentMode -Register "$($_.InstallLocation)\AppXManifest.xml"}
- This command will reset Microsoft Store Cache:
wsreset -i
¶ Install Microsoft Store - Method 2
-
-
This command will start powershell as admin
powershell.exe -Command "Start-Process powershell.exe -Verb RunAs"
- This command will install Microsoft Store from winget
winget install 9WZDNCRFJBMP
¶ winget
¶ Install winget
-
-
This command will start powershell as admin
powershell.exe -Command "Start-Process powershell.exe -Verb RunAs"
- This command will download winget with curl
curl -L -o "Microsoft.DesktopAppInstaller_8wekyb3d8bbwe.msixbundle" "https://github.com/microsoft/winget-cli/releases/latest/download/Microsoft.DesktopAppInstaller_8wekyb3d8bbwe.msixbundle"
- This command will install winget using Microsoft Store
start "" "Microsoft.DesktopAppInstaller_8wekyb3d8bbwe.msixbundle"
¶ Install winget - Method 2
This method is used when you get the error message: We can't open this 'ms-windows-store' link
-
-
This command will start powershell as admin
powershell.exe -Command "Start-Process powershell.exe -Verb RunAs"
- This command will download winget with curl
curl -L -o "Microsoft.DesktopAppInstaller_8wekyb3d8bbwe.msixbundle" "https://github.com/microsoft/winget-cli/releases/latest/download/Microsoft.DesktopAppInstaller_8wekyb3d8bbwe.msixbundle"
- This command will install winget using Add-AppxPackage
Add-AppxPackage -Path '.\Microsoft.DesktopAppInstaller_8wekyb3d8bbwe.msixbundle'
¶ Windows Server Errors
¶ We can't sign into your account Windows
regedit
HKEY_LOCAL_MACHINE\SOFTWARE\Microsoft\Windows NT\CurrentVersion\ProfileList
- Select the profile name that you need and delete it
¶ Windows deployment services shows only CMD
diskpart
list disk
select disk 0
If that's your main OS disk, usually is.
clean
Reboot and start your imaging process again.
¶ FAILURE (5616): 15299: Verify BCDBootEx
-
Make new file called: FixUEFIDetection.wsf in the folder: DeploymentShare\Scripts
-
Copy paste this script below in the FixUEFIDetection.wsf
<job id="FixUEFIDetection">
   <script language="VBScript" src="ZTIUtility.vbs"/>
   <script language="VBScript">

' // ***************************************************************************
' //
' // File:      FixUEFIDetection.wsf
' //
' // Version:   1.1
' //
' // Author:     Johan Arwidmark, @jarwidmark
' //
' // Sourch: https://github.com/DeploymentResearch/DRFiles/blob/master/Scripts/FixUEFIDetection.wsf
' // ***************************************************************************

oLogging.CreateEntry "Checking if running in WinPE or Full Windows", LogTypeInfo
oLogging.CreateEntry "OSVersion is: " & oEnvironment.Item("OSVersion"), LogTypeInfo

If oEnvironment.Item("OSVersion") = "WinPE" Then

    oLogging.CreateEntry "We are in WinPE, detecting firmware type from registry...", LogTypeInfo

    ' Getting firmware type from WinPE registry
    PEFirmwareType = oShell.Regread("HKEY_LOCAL_MACHINE\SYSTEM\CurrentControlSet\Control\PEFirmwareType")

    oLogging.CreateEntry "Firmware type from WinPE registry is " & PEFirmwareType, LogTypeInfo

    If PEFirmwareType = "2" Then
        oLogging.CreateEntry "Machine is configured for UEFI, setting the IsUEFI variable to True", LogTypeInfo
        oEnvironment.Item("IsUEFI") = "true"
    Else
        oLogging.CreateEntry "Machine is configured for BIOS, setting the IsUEFI variable to False", LogTypeInfo
        oEnvironment.Item("IsUEFI") = "false"
    End If
Else
    oLogging.CreateEntry "Detecting firmware type from Full Windows", LogTypeInfo

    Set objShell = CreateObject("WScript.Shell")
    Set objExecObject = objShell.Exec("bcdedit /enum BOOTMGR")

    Do While Not objExecObject.StdOut.AtEndOfStream
        strText = objExecObject.StdOut.ReadLine()
        If Instr(strText, "\EFI\Microsoft\Boot\bootmgfw.efi") > 0 Then
            oLogging.CreateEntry "Machine is configured for UEFI, setting the IsUEFI variable to True", LogTypeInfo
            oEnvironment.Item("IsUEFI") = "true"
            Exit Do
        End If
    Loop

    If oEnvironment.Item("IsUEFI") = "true" Then
        ' All good, do nothing
    Else
        oEnvironment.Item("IsUEFI") = "false"
    End If


End If


   </script>
</job>
-
Open DeploymentWorkbench and then Go to Deployment Shares --> MDT Deployment Share --> Task Sequences
-
Right click on Your Task Sequence that you wanna deploy with and select Properties
-
Click on Task Sequence tab and then go to Preinstall --> New Computer only
-
Click on Add --> General --> Run Command Line
-
Now take over the example below
Name: Fix UEFI Detection
Command line: cscript.exe "%SCRIPTROOT%\FixUEFIDetection.wsf"
-
Press the Up button till the Fix UEFI Detection is above Format and Partition Disk (BIOS)
-
Click Apply then OK
¶ SMSPXE.log - No boot action. Aborted / Not serviced. / no advertisements found
-
Open Configuration Manager Console
-
Go to Administration --> Overview --> Site Configuration --> Sites
-
Click on your site hostname
-
Click on Properties
-
Click on Deployment Verification tab then make sure Collection size limits are both at 0 take over this example
- Default size: 0
- Maximum size: 0
Then click Apply and then click OK
-
Go to Software Library --> Overview --> Operating Systems --> Task Sequences
-
Right click on your Task Sequence and select Deploy
-
For Collection: click Browse...
¶ Group policy tips & tricks
¶ Disable Web Search in Start Menu
gpedit.msc
-
Go to User Configuration --> Administrative Templates --> Windows Components --> File Explorer
-
Dubble click on "Turn off display of recent search entries in the File Explorer search box"
-
Select Enable then click Apply and then click Close
¶ Apply the Group Policy rules
cmd
gpupdate /force
¶ Outlook
¶ Repair profile
- Exit Outlook and browse to one of the following file locations:
-
Outlook 2019: C:\Program Files (x86)\Microsoft Office\root\Office16
-
Outlook 2016: C:\Program Files (x86)\Microsoft Office\root\Office16
-
Outlook 2013: C:\Program Files (x86)\Microsoft Office\Office15
-
Outlook 2010: C:\Program Files (x86)\Microsoft Office\Office14
-
Outlook 2007: C:\Program Files (x86)\Microsoft Office\Office12
-
Open SCANPST.EXE
-
Select Browse to select the Outlook Data File (.pst) you want to scan.
- Default profile location: C:\users\gebruikersnaam\Appdata\Local\microsoft\outlook
-
Click on Start to begin the scan.
-
If the scan finds errors, Click on Repair to fix the errors.
¶ VMware Workstation
¶ This virtual machine appears to be in use
- Shutdown VMware Workstation
- Go to the virtualmachine install folder
- Delete the .LCK folder
¶ Share folder
Make sure target folder exists!
apt install open-vm-tools fuse
vmhgfs-fuse /media/disk/vmshare/
¶ Disable automatic suspend
-
Right click on the vm name (in the list) and select Open VM Directory
-
Edit the .vmx file and add the following:
suspend.disabled = "TRUE"