MECM & Endpoint Protection
Do NOT install MECM & Endpoint Protection on a Domain Controller instead, install it on a member server
Disable 060 PXEClient from DHCP --> Server Options on your Domain Controller otherwise you cannot boot pxe in UEFI mode from the SCCM & Endpoint Protection server
Recommended drives or partitions
For best practice, make sure you have the following partitions ready
Local Disk (C:) | 250GB
MECM_Install (D:) | 50GB
MECM_SQL_MDF (E:) | 75GB
MECM_SQL_LDF (F:) | 25GB
SQL_TempDB (G:) | 25GB
SQL_WSUS_Database (H:) | 25GB
MECM_Application_Sources (I:) | 500GB
MECM_ContentLibrary (J:) | 500GB
Recommended Accounts & Groups
-
Security Group: MECM_SQL_FULLADMINS
-
Security Group: DOMAIN_FULLADMINS | Member of: Administrators, Domain Admins, Remote Desktop Users
-
User logon name: MECM_SQL Description: SQL Server service account for MECM | Member of: Domain Users, MECM_SQL_FULLADMINS
-
User logon name: MECM_PUSH Description: Client push account for MECM | Member of: Domain Users, MECM_SQL_FULLADMINS
-
User logon name: MECM_NAA Description: Network access account for MECM | Member of: Domain Users
-
User logon name: MECM_DomainJoin Description: Used to domain join device in a MECM task sequence
-
User logon name: Your own admin account name | Member of: DOMAIN_FULLADMINS
-
Create a file named: no_sms_on_drive.sms
-
Copy and paste no_sms_on_drive.sms on all drives but not on the MECM_ContentLibrary drive
-
Create a folder named Database in the following drives:
- SQL_WSUS_Database
- SQL_TempDB
- MECM_SQL_LDF
- MECM_SQL_MDF
Installing Roles & Features
-
Open Server Manager
-
Go to Tools -->> Add Roles and Features
-
Click next for Before you Begin, Installation Type, Server Selection.
-
Select Web Server (IIS) then click Add Features and click Next >
Add the following features read very carefully
-
NET Framework 3.5 Features click on the arrow and select HTTP Activation and Non-HTTP Activation
-
Click the arrow for .NET Framework 4.7 Features then click the arrow for WCF Services and select HTTP Activation and Message Queuing (MSMQ) Activation and Named Pipe Activation and TCP Activation
-
Select Background Intelligent Transfer Service (BITS)
-
Select Remote Differential Compression
- Click Next > for Features, Web Server Role (IIS)
-
Scroll down and Select Windows Authentication
-
Click on arrow for Application Development and select ASP .NET 3.5
-
Click on arrow for Management Tools and select IIS Management Scripts and Tools then select Management Service
- Click Next > and select Restart the desination server automatically if required then click Install
setspn
cmd
- Insert the following commands in cmd. Remember to change the domain and server to your domain
setspn -A MSSQLSvc/wserver02:1433 arcadeparty\MECM_SQL
setspn -A MSSQLSvc/wserver02.arcadeparty.lan:1433 arcadeparty\MECM_SQL
Firewall Rules
wf.msc
-
Right click on Inbound Rules then select "New Rule..."
-
Select Port: then click Next > Then add the following ports. After that click Next >
1433, 4022
-
Select Allow the connection then click Next >
-
Uncheck Private and Public then click Next >
-
Name it SQL then click Finish
Install SQL Server 2019
-
Run the setup.exe
-
Click on Installation and then click New SQL Server stand-alone installation or add features to an existing installation
-
Insert or skip the product key then click Next >
-
Select I accept the license terms. then click Next >
-
If you want you can select Use Micrsoft Update to check for updates (recommended) then click Next >
-
For Install Rules you can click Next >
-
Select Database Engine Services then click Next >
-
For Instance Configuration you can click Next >
-
For SQL Server Agent click on the small arrow under Account Name and select <<Browse...>> then Insert your service account named: MECM_SQL click on Check Names and then OK then insert the Password for the service account. Click on the small arrow under Startup Type and select Automatic
-
For SQL Server Database Engine click on the small arrow under Account Name and select <<Browse...>> then Insert your service account named: MECM_SQL click on Check Names and then OK then insert the Password for the service account. Click on the small arrow under Startup Type and select Automatic then click Next >
-
Click on Add Current User then click on TempDB > tab (OPTIONAL: You can also add a SQL admin group by clicking on the Add... button)
-
Click on Remove then click Add... and select a new partition location with the folder named Database then click OK
Example
SQL_TempDB (G:) --> Database Make sure you make a folder called Database in the new partition
- Set the Autogrowth (MB) to 256 then at TempDB log file: set the Autogrowth (MB) to 256 and then click Next > then click Install after that click Close
Install SQL Server Reporting Services
-
Run SQLServerReportingServices.exe
-
Select Install Reporting Services
-
Use the product key from SQL Server 2019 then click Next >
-
Select I accept the license terms then click Next > for Review the license terms and Install Database Engine
-
Click Install at the end click Close
Install SQL Server Management Studio (SSMS)
-
Run SSMS-Setup-ENU.exe
-
Click Install When install is completed click Close
-
From start menu, open Microsoft SQL Server Management Studio
-
Click Connect
-
Right click on your server (SQL Server 15.0.2000.5) and select Properties
-
Click on Memory then set following memory then click OK
- Minimum server memory (in MB). = 8192
- Maximum server memory (in MB). = 25600 (DEPENDS ON YOUR CONFIGURATION!)
- Restart Windows Server
Install WSUS
-
Open Server Manager
-
Go to Tools -->> Add Roles and Features
-
Click next for Before you Begin, Installation Type, Server Selection.
-
Select Windows Server Update Services then click Add Features and click Next > for Server Roles, Features, WSUS.
-
Uncheck WID Connectivity and then enable SQL Server Connectivity then click Next >
-
Create a folder called WSUS in the drive: MECM_ContentLibrary
-
Insert the right drive letter for MECM_ContentLibrary example:
- J:\WSUS
then click Next >
- Insert your domain server then click on Check connection example:
- wserver02.arcadeparty.lan
then click Next > and then click Install at the end click Close
-
When you see "⚠️" at the right top, click on Launch Post-Installation tasks
-
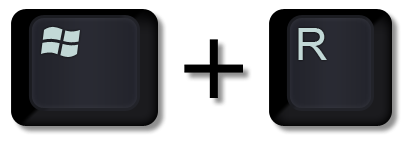
inetmgr
-
Click on your server then click Application Pools then Right click WsusPool and select Advanced Settings
-
Set the following values then click OK:
- Queue Length = 2000
- Private Memory Limit (KB) = 7372800
Install ADK & Windows PE addon
Make sure you install the ADK on the right Windows version! https://learn.microsoft.com/en-us/windows-hardware/get-started/adk-install
In this example we are on Windows Server 2022
We download ADK for Windows Server 2022--> https://go.microsoft.com/fwlink/?linkid=2162950
We also need the Windows PE add-on --> https://go.microsoft.com/fwlink/?linkid=2163233
Extend AD schema
-
Run MEM_Configmgr_.exe then click Unzip
-
Navigate to SSCM setup file "SMSETUP\BIN\X64" then hold the SHIFT key then right click on some emty space and select Open PowerShell window here
.\extadsch.exe
If the powershell menu is not showing then install latest powershell When installing powershell ENABLE EVERY CHECKMARK from the setup https://aka.ms/PSWindows
ADSI
Go to your windows server Domain Controller machine
-
Open Server Manager
-
Go to Tools -->> ADSI Edit
-
Right click ADSI Edit and select Connect to... and then click OK
-
Go to Default naming context --> DC=arcadeparty,DC=lan
-
Right click CN=System and select New --> Object...
-
Select container then click Next >
-
Insert the Value: in example below then click Next > and then Finish
System Management
-
Dubble click on CN=System then right click CN=System Management and select Properties
-
Click on Security tab then click Add... click Object Types... select Computers then click OK Insert the Domain Controller computer name example: wserver02 then click Check Names then click OK. Select Full control then click Apply and OK
Install MECM
We assume that you already have the Microsoft Endpoint Configuration Manager package files If not then you can download the trial version here (for lab) https://www.microsoft.com/en-us/evalcenter/evaluate-microsoft-endpoint-configuration-manager
-
Run splash.hta from the unzipped MEM_Configmgr_.exe
-
Click Install then click Next >
-
If you have product key, insert that then click Next >
-
Checkmark all 3 License Terms then click Next >
-
Click on Browse... then make a new folder called MECM_Prequisite_Files at the location where MEM_Configmgr_.exe is then click OK then Next >
-
If you want you can select more languages then click Next >
-
Same thing... if you want you can select more languages then click Next >
-
Make a new folder called Microsoft Configuration Manager in the drive MECM_Install then at Site and Installation Settings you can take over the example and change what you need then click Next >
Site code: IT1
Site name: Arcadeparty HQ Site
Installation folder: D:\Microsoft Configuration Manager
-
Select Install the primary site as a stand-alone site then click Next > and then click Yes
-
Click Next >
-
Specify the locations for the SQL server data and log file
-
MECM_SQL_MDF (E) = Path to the SQL Server data file = E:\Database
-
MECM_SQL_LDF (F) = Path to the SQL Server log file = F:\Database
If you did not create a database leave it default then click Next >
-
Select Configure the communication method on each site system role then click Next > (If you have setup certificats then select: All site system roles accept only HTTPS communication from clients)
-
Click Next > for Site System Roles, Service Connection Point Setup, Prerequisite Check.
-
Go to the location of the MEM_Configmgr folder then go to \SMSSETUP\TOOLS and then copy CMTrace.exe to the C drive: C:\
-
Run CMTrace.exe one time then close it
-
click Begin Install now you can open the ConfigMgrSetup.log to check the progress of the install when its finished click Close
This is a big installation, it can take up to 1 hour!
Configure Report Server
-
From the start menu, Open Report Server Configuration Manager
-
Click Connect
-
Click on Web Service URL tab then make sure the Virtual Directory is named: ReportServer then click Apply
-
Click on Database tab then click Change Database
-
Select Create a new report server database. then click Next
-
Click Test Connection to see if it can connect then click Next
-
Make sure the Database Name is called: ReportServer then click Next
-
Click Next for Credentials, Summary at the end click Finish
-
Click on Web Portal URL tab then make sure the Virtual Directory is named: Reports then click Apply and click Exit
Configure MECM
-
From the start menu, Open Configuration Manager Console
-
Click Administration (bottom left)
-
Go to Site Configuration --> Servers and Site System Roles
-
Right click on your server name then select Add Site System Roles
-
Click Next >
-
If you use a proxy then configure that then click Next >
-
Enable the following roles:
- Endpoint Protection point
- Fallback status point
- Reporting services point
- Software update point
then click Next >
-
Select WSUS is configured to use ports 8530 and 8531 for client communications (default settings for WSUS on Windows Server 2012 then click Next >
-
If you use a proxy then configure that then click Next >
-
Click Next > again
-
Select Enable synchronization on a schedule then select Custom schedule and set it to 12:00 AM for 1 Days then click OK then click Next >
-
If you wanna change both settings to Immediately expire a superseded software update it will force feature updates to be updated if not then leave defaults then click Next >
-
If you want you can enable all automatic tasks if not leave it defeault then click Next >
-
If you want you change the maximum run time if not leave it defeault then click Next >
-
Select Download full files for all approved updates then click Next >
-
Select the following classifications:
- Critical Updates
- Definition Updates
- Security Updates
- Service Packs
- Update Rollups
- Updates
- Upgrades
then click Next >
-
Enable All Products then Disable All Products then go to All Products --> Microsoft --> Windows then enable Windows 10 and then click Next >
-
Select your languages then click Next >
-
keep fallback status default then click Next >
-
Click on Verify then click Set... then select New Account then click Browse... then enter the SQL Service Account example: MECM_SQL click Check Names then click OK then insert the password of the Service Account then click OK and then click Next >
-
Select Basic membership then click Next >
-
Click Next > for summary and then click Close
Configure client push
Make sure you have a Service Account ready for the client push
Example
User logon name: MECM_PUSH
(Password never expires)
-
Open Configuration Manager Console
-
Go to Administration --> Site Configuration --> Sites
-
Right click on your server then select Client Installation Settings --> Client Push Installation
-
Click on Accounts tab then click on the yellow star and select New Account
-
Click on Browse... then insert MECM_PUSH and then click Check Names click OK then insert the password of the Service Account and then click OK then Apply and then OK
Make sure you have a Service Account ready for the client push
Example
User logon name: MECM_NAA
(Password never expires)
-
Go to Settings --> Configure Site Components --> Software Distribution
-
Click on Network Access Account tab then select Specify the account that accesses network locations and then click on the yellow star and select New Account
-
Click on Browse... then insert MECM_NAA and then click Check Names click OK then insert the password of the Service Account and then click OK then Apply and then OK
Configure MECM GPO
Go to your windows server Domain Controller machine
gpmc.msc
-
Make a new GPO named: MECM Settings You can place this in a OU named MECM-Site-Workstations or place the GPO under your domain name
-
Right click MECM Settings then select Edit...
-
Go to Computer Configuration --> Preferences --> Control Panel Settings --> Local Users and Groups and then click Standard tab then right click on emty space and select New > Local Group
-
For Group name choose: Administrators (build-in) then click Add... and click on ... then insert MECM_PUSH and then click Check Names click OK
-
Click Add... and click on ... then insert DOMAIN_FULLADMINS and then click Check Names click OK then click Apply and then OK
-
Go to Computer Configuration --> Policies --> Windows Settings --> Security Settings --> Windows Defender Firewall with Advanced Security --> Windows Defender Firewall with Advanced Security LDAP --> Inbound Rules -->
-
Right click on Windows Defender Firewall with Advanced Security LDAP then select "Properties"
-
Right click on Inbound Rules then select "New Rule..."
-
Select Port: then click Next > Then add the following ports. After that click Next >
2701
-
Select Allow the connection then click Next >
-
Uncheck Private and Public then click Next >
-
Name it Allow MECM Remote Control then click Finish
-
Right click on Outbound Rules then select "New Rule..."
-
Select Port: then click Next > Then add the following ports. After that click Next >
10123
-
Select Allow the connection then click Next >
-
Uncheck Private and Public then click Next >
-
Name it MECM Client Notifications then click Finish
Configure Boundaries
-
Open Configuration Manager Console
-
Go to Administration --> Hierarchy Configuration --> Boundaries
-
Right click Boundaries and select Create Boundary
-
Set the Describtion to Lab - IP Range then set Type to: IP addreses range then you can takeover this example below and make changes if you need
- Starting IP address: 192.168.1.1
- Ending IP address: 192.168.1.255
then click Apply and then OK
-
Right click Boundary Groups and select Create Boundary Group
-
Name it: Lab IP Range - DP to wserver02 then Click Add... then select the IP adresses and click OK then click Apply then OK
-
Right click Boundary Groups and select Create Boundary Group
-
Name it: Site Assignment then Click Add... then select the IP adresses and click OK click on References tab and select Use this boundary group for site assignment then click Apply then OK
Configure Client Discovery
-
Open Configuration Manager Console
-
Go to Administration --> Hierarchy Configuration --> Discovery Methods
-
Dubble click on Active Directory System Discovery
-
Select Enable Active Directory System Discovery then click on the yellow star then click Browse... select the folder example SCCM-Site-Workstations or domain you want to discover then click OK then click Apply and then OK
-
Click on Device Collections then click All Systems (If you cannot find your client computer then right click on All Systems and select Update Membership)
Discovery logs can be found in:
MECM_INSTALL drive: Microsoft Configuration Manager/Logs/adsysdis.log
Configure Custom Client Settings
-
Open Configuration Manager Console
-
Go to Administration --> Hierarchy Configuration --> Client Settings
-
Click on Create Custom Client Device Settings
-
Name it: Lab Default Settings
-
Select the following settings (You can select more settings if you want to custommize more)
- Client Policy
- Computer Agent
- Endpoint Protection
- Software Center
After you configured the settings like you click OK
-
Right click Lab Default Settings and select Deploy then select All Desktop and Server Clients then click OK
-
Go to Administration --> Distribution Points
-
Right click on your server name and select Properties
-
Click on Boundary Groups tab
-
Select your Boundary groups then click OK then click Apply and then OK
Pushing the settings to clients
-
Right click on a client you want to push the changes to then select Install Client (For group push go to Device Collections and then right click on the group and select Install Client)
-
Select Install the client software from a specified site then click Next > then click Next > again and then click Close
Client install logs can be found in:
MECM_INSTALL drive: Microsoft Configuration Manager/Logs/ccm.log
Remote Client install logs can be found in:
hostname/admin$/ccmsetup/Logs/ccmsetup.log
Create applications (.msi)
For this example we will use 7-Zip 64 bit https://www.7-zip.org/
-
Open Configuration Manager Console
-
Go to Software Library --> Overview --> Application Management --> Applications
-
Right click Applications and select Create Application
-
Select Windows Installer (.msi file) then click Browse... then locate the 7zip msi installer then click Next >
Make sure the 7-Zip msi installer is on a shared partition folder example: \\wserver01\applications\7-zip\7z2201-64x.msi
- For 7-Zip you can take over this example below with changes you want to make
Name: 7-Zip 22.01
Administrator comments: 7-Zip is a file archiver with a high compression ratio.
Publisher: Igor Pavlov
Software version: 22.01
- For Installation program you can add this line after the prefilled text
REBOOT=REALLYSUPPRESS /L*V %temp%\7ZIPInstall.log
-
For Install behavior: select Install for system then click Next > and then after Progress click Close
-
Right click the 7-Zip application that has been created and select Properties
-
Select Allow this application to be installed from the Install Apllication task sequence action without being deployed then click on Software Center tab
-
For User categories Click Edit... then click Create... and make a couple of categories like:
- Archivers
- Browsers
- Editors
- Plugins
Now select Archivers then click OK
- Take over this example below with changes you want to make
User documentation: https://www.7-zip.org/support.html
Link text: Documentation
Privacy URL: https://www.7-zip.org/license.txt
Keywords: Archiver, 7-zip, zip
To get the icon you need to download the .exe version --> https://www.7-zip.org/
-
For Icon click Browse... then locate the 7zip .exe file then click Apply then OK
-
Click on Deployment Types tab then right click 7-Zip (version) (x64 edition) - Windows Installer (.msi file) and select Properties
-
Name it 7-Zip insertversion - MSI - x64 then click Programs tab
-
For Product code click Browse... then locate the 7-Zip msi installer after that click User Experience tab
-
Set Maximum allowed run time (minutes) to 15 and Estimated installation time (minutes): to 1 then Click Requirements tab
-
Click Add... then for Category select Device then select all x64 windows systems you want then click OK then Apply and then OK
Create applications (.exe)
For this example we will use Notepad++ 64 bit https://notepad-plus-plus.org/
-
Open Configuration Manager Console
-
Go to Software Library --> Overview --> Application Management --> Applications
-
Right click Applications and select Create Application
-
Select Manually specify the application information then click Next >
-
Take over this example below with changes you want to make
-
For User categories Click Edit... then click Create... and make a couple of categories like:
- Archivers
- Browsers
- Editors
- Plugins
Now select Editors then click OK
Name: Notepad++ insertversion
Administrator comments: Supports tabbed editing, which allows working with multiple open files in a single window.
Publisher: Notepad++ Team
Software version: insertversion
Then click Next >
- Take over this example below with changes you want to make
User documentation: https://npp-user-manual.org/
Link text: Documentation
Privacy URL: https://notepadplusapp.com/privacy
Localized description: Notepad++ is a text editor and source code editor for use with Microsoft Windows. It supports tabbed editing, which allows working with multiple open files in a single window.
Keywords: editor, notepad,
Then click Next >
-
Click Add... then for Type: select Script Installer then select Manually specify the deployment type information then click Next >
-
Take over this example below with changes you want to make
Name: Notepad++ insertversion - EXE - x64
Administrator comments: insert any comment you want
Then click Next >
- For Content location: click Browse... then locate the Notepad++ installer
Make sure the Notepad++ EXE installer is on a shared partition folder example: \\wserver01\applications\notepadplusplus\npp.8.4.6.Installer.x64.exe
- For Installation program: click Browse... then locate the Notepad++ installer then add /S after .exe"**
example
"npp 8.4.6 Installer.exe" /S
-
For Unistall program: insert this: "C:\Program Files\Notepad++\uninstall.exe" /S then click Next >
-
For Install behavior: select Install for system then for Logon requirement: select Whether or not a user is logged on then set Maximum allowed run time (minutes): 15 and Estimated installation (minutes): 1 then click Next >
-
You can skip Requirements and Dependencies or add some then click Next > then after Progress click Close
-
Right click the Notepad++ application that has been created and select Properties
-
Select Allow this application to be installed from the Install Apllication task sequence action without being deployed then click Apply then OK
Deploy applications
-
Open Configuration Manager Console
-
Go to Software Library --> Overview --> Application Management --> Applications
-
Right click on your application and select Deploy
-
Select All Users or what you want then click Next >
-
Click Add and select Distribution Point Group then select All Distribution Points then click OK and then click Next >
-
Click Next > for Deployment Settings, Scheduling
-
For User notifications select Display in Software Center, and only show notifications for computers restarts then click Next > for Alerts, Summary then click Close
Apps install logs can be found in:
hostname/admin$/CCM/Logs/AppEnforce.log
Update applications
-
Open Configuration Manager Console
-
Go to Software Library --> Overview --> Application Management --> Applications
-
Right click Applications and select Create Application
From here create the application the same way you did for example 7-Zip MSI or notepad++ EXE | BUT DOWNLOAD THE LATEST UPDATE FROM THE WEBSITE
-
Right click on the newest version application and select Properties
-
Click on Supersedence tab
-
Click Add... then click Browse...
-
Choose the old version of the application you want to replace
-
For New Deployment Type Choose the newest version of the application Make sure the x64 or x86 matches with the Old Deployment Type app then click OK then click Apply and then click OK
-
Right click on the newest version application and select Deploy
-
Select All Users or what you want then click Next >
-
Click Add and select Distribution Point Group then select All Distribution Points then click OK and then click Next >
-
Select Automaticlly upgrade any superseded versions of this application then click Next >
-
You can Schedule a time if you want then click Next > for User Experience, Alerts, Summary after progress then click Close
Create Device Collections
Device Collections --> Software Updates
-
All Servers | Limiting Collection - All Systems
-
All Workstations | Limiting Collection - All Systems
-
01 - Workstation Patching - Pilot IT Department | Limiting Collection - All Workstations
-
02 - Workstation Patching - Early Adopters | Limiting Collection - All Workstations
-
03 - Workstation Patching - Broad Deployment | Limiting Collection - All Workstations
-
Maintenance Windows - All Workstations - Non-Pilot | Limiting Collection - All Workstations
Configure Domain join acc
Go to your windows server Domain Controller machine
dsa.msc
Right click your domain name and select Properties
Click on Security tab then click Advanced then Click Add then click Select a principal
Insert the account named MECM_DomainJoin then click Check Names then click OK
For premissions select the following:
- Create Computer objects
- Delete Computer objects
For Applies to: select Descendant Computer Objects
For premissions select the following:
- Write all properties
- Reset password
- Change password
- Validated write to DNS host name
- Validated write to service principal name
Then click OK then click Apply then click OK and then click OK
Configure MECM PXE
-
Open Configuration Manager Console
-
Go to Software Library --> Overview --> Operating Systems --> Boot Images
-
Right click on Boot image (x64) and select Properties
-
Click on Customization tab then for Set default keyboard layout in WinPE: select English (United States) then click Apply then OK
-
Right click on Boot image (x64) and select Distribute Content
-
Click Next > then click Add and select Distribution Point then select your server and then click OK then click Next > for Summary after progress click Close
-
Go to Operating System Images then right click Operating System Images and select Add Operating System Image
-
Click Browse... then locate the install.wim extracted from the Windows iso of your choise then click Next >
-
Take over this example below with changes you want to make
Name: Windows 10 Enterprise Only 21h2 x64 - Install WIM
Version: 19-06-2022
Comment: Enterprise only version of Windows 10
Then click Next > for Summary then after Progress click Close
Windows ADK Boot images can be found in:
\\hostname\SMS_IT1\OSD\boot
Deploy MECM PXE
-
Open Configuration Manager Console
-
Go to Software Library --> Overview --> Operating Systems --> Operating System Images
-
Right click on your Windows image and select Distribute Content
-
Click Next > then click Add and select Distribution Point and select your host then click OK Then click Next > for Summary then after Progress click Close
-
Go to Administration --> Overview --> Site Configuration --> Servers and Site System Roles
-
Click on your server domain name then Right click on Distribution point and select Properties
-
Click on PXE tab then enable the following:
-
Enable PXE support for clients and click Yes
-
Allow this distribution point to respond to incoming PXE requests
-
Enable unknown computer support and click Yes
- Disable Require a password when computers use PXE
Then click Apply and then click OK
Create Task Sequence MECM PXE
-
Open Configuration Manager Console
-
Go to Software Library --> Overview --> Operating Systems --> Operating System Images --> Task Sequences
-
Right click Task Sequences and select Create Task Sequence
-
Select Install an existing image package then click Next >
-
Name it like Windows 10 21h2 x64 then click Browse... and select the boot image then click Next >
-
For Image package click Browse... and select your image
-
DISABLE Configure task sequence for use with BitLocker
-
Select Enable the account and specify the local administrator password then give it a password then click Next >
-
Select Join a domain and insert your domain info and location for OU Workstations
-
For Account: click Set... then insert MECM_DomainJoin then click Check Names then click OK then insert the password of the DomainJoin account then click OK and then click Next >
-
Click Next > again
-
For State Migration DISABLE the following:
-
Capture user settings and files
-
Capture network settings
-
Capture Microsoft Windows settings
Then click Next >
-
Click Next > again
-
If you want you can add applications by clicking the yellow star otherwise click Next > after Progress click Close
Configure Task Sequence MECM PXE
-
Right click on created Task Sequence and select Edit
-
Click Apply Windows Settings You might wanna change the Username + Organization name and Time zone. If you are done then click Apply then OK
Deploy Task Sequence MECM PXE
-
Right click on your task sequence and select Deploy
-
For Collection click Browse... then select All Unknown Computers then click OK and then click Next >
-
Make available to the following select Only media and PXE then click Next >
-
Click Next > for Scheduling, User Experience, Alerts, Distribution Points, Summary. After Progress click Close
Rename client variable MECM PXE
-
Open Configuration Manager Console
-
Go to Assets and Compliance --> Overview --> Device Collections
-
Right click All Unknown Computers and select Properties
-
Click on Collection variables tab then click the yellow star
-
Name it OSDComputerName then click OK and then click OK
Change Ramdisk (optional)
This will change the size of the package for the boot image to the client it will make the PXE process faster
regedit
-
Go to Computer\HKEY_LOCAL_MACHINE\SOFTWARE\Microsoft\SMS\DP
-
Right click then New > DWORD (32-bit) Value
-
Name it: RamDiskTFTPBlockSize
-
Right click RamDiskTFTPBlockSize and select Modify...
-
For Base select Decimal
-
For Value data insert: 16384
-
Click OK
-
services.msc
- Locate Windows Deployment Services Server then right click and select Restart
PXE logs can be found in:
\\hostname\SMS_IT1\Logs\SMSPXE.log
Microsoft Exchange Server 2019
Do NOT install Microsoft Exchange Server 2019 on a Domain Controller instead, install it on a member server
Recommended drives
For best practice, make sure you have the following partitions ready
Local Disk (C:) | 250GB
DB01 (E:) | 50GB
DB01-Logs (F:) | 50GB
Prerequisites
-
Download and run the following file with powershell
01_-_install-requirements.ps1 -
Download and install Visual C++ Redistributable Package for Visual Studio 2012
https://www.microsoft.com/en-us/download/details.aspx?id=30679 -
Download and install Visual C++ Redistributable Package for Visual Studio 2013
https://www.microsoft.com/en-US/download/details.aspx?id=40784 -
Download and install .NET Framework 4.8
https://support.microsoft.com/en-us/topic/microsoft-net-framework-4-8-offline-installer-for-windows-9d23f658-3b97-68ab-d013-aa3c3e7495e0 -
Download and install Unified Communications Managed API 4.0
https://www.microsoft.com/download/details.aspx?id=34992 -
Download and install URL Rewrite Module
https://www.iis.net/downloads/microsoft/url-rewrite
Install Exchange Server 2019
-
Download Exchange Server 2019
https://www.microsoft.com/en-us/download/details.aspx?id=105180 -
Run setup.exe from ExchangeServer2019-x64-CU13.ISO
Configure Exchange Server 2019
Exchange Admin Center = https://localhost/ecp/
Outlook Web Access = https://localhost/owa/
-
Open any web browser and visit the following link: https://localhost/ecp/
-
Login with your current windows server credentials
-
Go to Servers > Databases
-
Click on Edit (pencil icon)
-
Rename it to: DB01 Then click on save
-
cmd
start "Exchange Management Shell" "C:\ProgramData\Microsoft\Windows\Start Menu\Programs\Microsoft Exchange Server 2019\Exchange Management Shell.lnk"
- At Exchange Management Shell insert the following commands:
Dismount-Database -Identity DB01 -Confirm:$false
Move-DatabasePath -Identity DB01 -EdbFilePath E:\DB01\DB01.edb -LogFolderPath F:\DB01 -Confirm:$false
Mount-Database -Identity DB01 -Confirm:$false
Create User Mailbox
-
Open any web browser and visit the following link: https://localhost/ecp/ and Login
-
Go to > recipients > mailboxes
-
Click on the plus icon (+) then select User mailbox
-
For Existing user click on Browse...
Create Resource Mailbox
-
Open any web browser and visit the following link: https://localhost/ecp/ and Login
-
Go to > recipients > resources
-
Click on the plus icon (+) then select Room mailbox
-
Provide your preferences then click Save
EXAMPLE
Room Name: Conference Room A
Alias: ConfRoomA
Organizational Unit: arcadeparty.lan/02-Organizations/arcadeparty/Resources/Meeting Rooms
Location: Floor 1, West Wing
Phone: 6841
Capacity: 20
-
Click on the plus icon (+) then select Equipment mailbox
-
Provide your preferences then click Save
EXAMPLE
Equipment name: BenQ MH733 Projector
Alias: benqprojector01
Organizational Unit: arcadeparty.lan/02-Organizations/arcadeparty/Resources/Meeting Rooms
Configure Room Mailbox
-
Open any web browser and visit the following link: https://localhost/ecp/ and Login
-
Go to recipients > resources
-
Select your Room Mailbox and click on Edit (pencil icon)
The settings for booking delegates, booking options, contact information, is personal preference
-
Select booking options
-
For If you want the meeting organizer to receive a reply, enter the text below. You can use and edit the template below:
Dear [Meeting Organizer's Name],

Thank you for booking [Meeting Room Name] for your upcoming meeting on [Date and Time]. Your reservation has been confirmed.

Meeting Details:
- Room: [Meeting Room Name]
- Date: [Date]
- Time: [Start Time] to [End Time]

If you have any special requests or need to make changes to your reservation, please feel free to contact us at [Contact Information].

We look forward to hosting your meeting, and if you require any additional assistance, don't hesitate to reach out.

Best regards,
[Your Name]
[Your Title]
[Your Contact Information]
- Select MailTip then you can use and edit the template below:
Please remember to book this meeting room in advance to ensure availability.
Create Distribution Groups
-
Open any web browser and visit the following link: https://localhost/ecp/ and Login
-
Go to recipients > groups
-
Click on the plus icon (+) then select Distribution Group
-
Provide your preferences
EXAMPLE
Display name: Helpdesk
Alias: helpdesk
Notes: User Support group
Organizational Unit: arcadeparty.lan/01-ICT-Services/Groups/Distribution Groups
-
Disable Add group owners as members
-
For Choose whether owner approval is required to join the group. Select Closed: Members can be added only by the group owners. All requests to join will be rejected automatically.
-
For Choose whether the group is open to leave. Select Closed: Members can be removed only by the group owners. All requests to leave will be rejected automatically.
Create Security Groups
-
Open any web browser and visit the following link: https://localhost/ecp/ and Login
-
Go to recipients > groups
-
Click on the plus icon (+) then select Security Group
-
Provide your preferences
EXAMPLE
Display name: IT Support
Alias: itsupport
Notes: Security Support group
Organizational Unit: arcadeparty.lan/01-ICT-Services/Groups/Distribution Groups
- Disable Add group owners as members
Create Shared Mailbox
-
Open any web browser and visit the following link: https://localhost/ecp/ and Login
-
Go to recipients > shared
-
Click on the plus icon (+)
-
Provide your preferences
EXAMPLE
Display name: General Information
Alias: contact
Organizational Unit: arcadeparty.lan/01-ICT-Services/Groups/Distribution Groups
Configure email address policies
-
Open any web browser and visit the following link: https://localhost/ecp/ and Login
-
Go to mail flow > email address policies
-
Click on the plus icon (+)
Policy name: Email Address Format Policy
-
For Email Address Format click on the plus icon (+)
-
Select [email protected] then click Save and Save again
cmd
start "Exchange Management Shell" "C:\ProgramData\Microsoft\Windows\Start Menu\Programs\Microsoft Exchange Server 2019\Exchange Management Shell.lnk"
- At Exchange Management Shell insert the following commands:
Update-EmailAddressPolicy -Identity "Email Address Format Policy"
Create Custom Global Address List
cmd
start "Exchange Management Shell" "C:\ProgramData\Microsoft\Windows\Start Menu\Programs\Microsoft Exchange Server 2019\Exchange Management Shell.lnk"
- At Exchange Management Shell insert the following commands:
New-GlobalAddressList -Name "ARCADEPARTY GAL" -IncludedRecipients "AllRecipients" -ConditionalCompany "ARCADEPARTY"
Get-GlobalAddressList
Update-GlobalAddressList -Identity "ARCADEPARTY GAL"
Configure POP3
powershell
Start-Process powershell -Verb RunAs
Set-Service -Name MSExchangePop3 -StartupType Automatic ; Set-Service -Name MSExchangePOP3BE -StartupType Automatic
Create Offline Address Book
cmd
start "Exchange Management Shell" "C:\ProgramData\Microsoft\Windows\Start Menu\Programs\Microsoft Exchange Server 2019\Exchange Management Shell.lnk"
- At Exchange Management Shell insert the following commands:
Get-GlobalAddressList
New-OfflineAddressBook -Name "ARCADEPARTY OAB" -AddressLists "ARCADEPARTY GAL" -GlobalWebDistributionEnabled $true
Get-OfflineAddressBook
-
Open any web browser and visit the following link: https://localhost/ecp/ and Login
-
Go to Servers > Databases
-
Click on Edit (pencil icon)
-
Click on client settings
-
For Offline address book: click on Browse...
-
Select the Offline address book that you just made then click OK then click Save
Automate Exchange Profile Pictures
Make sure to run this script at Exchange Member Server inside Exchange Management Shell
- Save the following script as: set-profile-pictures.ps1 in c:\scripts
# Define the list of user login names (usernames)
$userList = @("pindip", "pinmab")

# Define the folder path where profile pictures are stored
$pictureFolderPath = "C:\ProfilePictures"

# Loop through each user in the list
foreach ($user in $userList) {
    # Construct the path to the user's profile picture file
    $picturePath = Join-Path -Path $pictureFolderPath -ChildPath "$user.png"

    # Check if the profile picture file exists
    if (Test-Path $picturePath -PathType Leaf) {
        # Set the user's profile picture in Exchange
        Set-UserPhoto -Identity $user -PictureData ([System.IO.File]::ReadAllBytes($picturePath)) -Confirm:$false
        Write-Host "Profile picture for user $user set successfully."
    } else {
        Write-Host "Profile picture file for user $user not found in $pictureFolderPath."
    }
}

Read-Host "Press Enter to exit..."
cmd
start "Exchange Management Shell" "C:\ProgramData\Microsoft\Windows\Start Menu\Programs\Microsoft Exchange Server 2019\Exchange Management Shell.lnk"
cd c:\scripts
.\set-profile-pictures.ps1
Automate AD Profile Pictures
Specify the correct OU and DC path for your domain at LINE 5
Replace arcadeparty.lan with your correct domain at LINE 2
- Save the following powershell script as: set-policy-ad-user-picture.ps1 in c:\scripts
# Create a new GPO on the domain level
New-GPO -Name "AccountPicturePermissions" -Domain "itgoit.lan" -Comment "Set registry key permissions for Account Pictures"

# Link the GPO to the desired Organizational Unit (OU)
$ouPath = "OU=Users,OU=Accounts,OU=itgoit,OU=02-Organizations,DC=itgoit,DC=lan"  # Replace with your OU path
New-GPLink -Name "AccountPicturePermissions" -Target $ouPath

# Get all computer objects in the specified OU
$computers = Get-ADComputer -Filter * -SearchBase $ouPath

# Loop through each computer and force a Group Policy update
foreach ($computer in $computers) {
    $computerName = $computer.Name
    Invoke-GPUpdate -Computer $computerName -Force
    Write-Host "Forced Group Policy update on $computerName"
}

Write-Host "GPO AccountPicturePermissions created at Group Policy Objects"
- Right-click set-policy-ad-user-picture.ps1 then select Run with PowerShell
Make sure the profile picture file name is in the format username.png
Example:
AD username: johnsmith
Filename: johnsmith.png in C:\ProfilePictures
- Save the following powershell script as: set-ad-user-picture-with-compression.ps1 in c:\scripts
# Define the path to the folder containing profile pictures
$pictureFolderPath = "C:\ProfilePictures"

# Get a list of image files in the folder
$pictureFiles = Get-ChildItem -Path $pictureFolderPath -File

# Loop through each image file
foreach ($pictureFile in $pictureFiles) {
    # Extract the username from the file name (assuming the file name is in the format "username.png")
    $username = $pictureFile.BaseName

    # Check if the user exists in Active Directory
    $adUser = Get-AdUser -Filter {SamAccountName -eq $username}

    if ($adUser) {
        # Load the PNG image
        $pngImage = [System.Drawing.Image]::FromFile($pictureFile.FullName)

        # Resize the image to 96x96 pixels
        $desiredWidth = 96
        $desiredHeight = 96
        $jpegImage = New-Object System.Drawing.Bitmap $desiredWidth, $desiredHeight
        $graphics = [System.Drawing.Graphics]::FromImage($jpegImage)
        $graphics.DrawImage($pngImage, 0, 0, $desiredWidth, $desiredHeight)

        # Convert the JPEG image to a byte array
        $jpegBytes = [System.IO.MemoryStream]::new()
        $jpegImage.Save($jpegBytes, [System.Drawing.Imaging.ImageFormat]::Jpeg)

        # Ensure the image size is less than 100 kB
        if ($jpegBytes.Length -gt 100 * 1024) {
            Write-Host "Error: Image size exceeds 100 kB for user $username. Please compress the image."
        }
        else {
            # Set the user's thumbnailPhoto attribute with the image data
            Set-AdUser -Identity $username -Replace @{thumbnailPhoto=$jpegBytes.ToArray()}

            Write-Host "Profile picture for user $username updated successfully."
        }
    } else {
        Write-Host "User $username not found in Active Directory."
    }
}
-
Right-click set-ad-user-picture-with-compression.ps1 then select Run with PowerShell
-
gpmc.msc
-
Go to Forest: arcadeparty.lan > Domains > arcadeparty.lan > Group Policy Objects > AccountPicturePermissions
-
Right-click AccountPicturePermissions then select Edit...
-
Go to: Computer Configuration > Policies > Windows Settings > Security Settings > Registry
-
Right-click Registry then select Add key...
-
Selected key: MACHINE\SOFTWARE\Microsoft\Windows\CurrentVersion\AccountPicture\Users Then click OK
-
Allow Full Control for Users then click Apply then click OK
-
Select Replace existing permissions on all subkeys with inheritable permissions then click OK
-
Go to: User Configuration > Policies > Windows Settings > Scripts (Logon/Logoff)
-
Right-click Logon and select Properties
-
Click PowerShell Scripts and then click Add...
-
Script Name: %windir%\System32\WindowsPowerShell\v1.0\powershell.exe
-
Script parameters: -Noninteractive -ExecutionPolicy Bypass -Noprofile -File %logonserver%\netlogon\scripts\set-local-user-picture.ps1
cmd
mkdir %logonserver%\netlogon\scripts\
- Save the following powershell script as: set-local-user-picture.ps1 in %logonserver%\netlogon\scripts\
[CmdletBinding(SupportsShouldProcess=$true)]Param()
function Test-Null($InputObject) { return !([bool]$InputObject) }

Function ResizeImage() {
param([String]$ImagePath, [Int]$Quality = 90, [Int]$targetSize, [String]$OutputLocation)

Add-Type -AssemblyName "System.Drawing"

$img = [System.Drawing.Image]::FromFile($ImagePath)

$CanvasWidth = $targetSize
$CanvasHeight = $targetSize

#Encoder parameter for image quality
$ImageEncoder = [System.Drawing.Imaging.Encoder]::Quality
$encoderParams = New-Object System.Drawing.Imaging.EncoderParameters(1)
$encoderParams.Param[0] = New-Object System.Drawing.Imaging.EncoderParameter($ImageEncoder, $Quality)

# get codec
$Codec = [System.Drawing.Imaging.ImageCodecInfo]::GetImageEncoders() | Where {$_.MimeType -eq 'image/jpeg'}

#compute the final ratio to use
$ratioX = $CanvasWidth / $img.Width;
$ratioY = $CanvasHeight / $img.Height;

$ratio = $ratioY
if ($ratioX -le $ratioY) {
$ratio = $ratioX
}

$newWidth = [int] ($img.Width * $ratio)
$newHeight = [int] ($img.Height * $ratio)

$bmpResized = New-Object System.Drawing.Bitmap($newWidth, $newHeight)
$graph = [System.Drawing.Graphics]::FromImage($bmpResized)
$graph.InterpolationMode = [System.Drawing.Drawing2D.InterpolationMode]::HighQualityBicubic

$graph.Clear([System.Drawing.Color]::White)
$graph.DrawImage($img, 0, 0, $newWidth, $newHeight)

#save to file
$bmpResized.Save($OutputLocation, $Codec, $($encoderParams))
$bmpResized.Dispose()
$img.Dispose()
}

#get sid and photo for current user
$user = ([ADSISearcher]"(&(objectCategory=User)(SAMAccountName=$env:username))").FindOne().Properties
$user_photo = $user.thumbnailphoto
$user_sid = [System.Security.Principal.WindowsIdentity]::GetCurrent().User.Value
Write-Verbose "Updating account picture for $($user.displayname)..."

#continue if an image was returned
If ((Test-Null $user_photo) -eq $false)
{
Write-Verbose "Success. Photo exists in Active Directory."

#set up image sizes and base path
$image_sizes = @(32, 40, 48, 96, 192, 200, 240, 448)
$image_mask = "Image{0}.jpg"
$image_base = $env:public + "\AccountPictures"

#set up registry
$reg_base = "HKLM:\SOFTWARE\Microsoft\Windows\CurrentVersion\AccountPicture\Users\{0}"
$reg_key = [string]::format($reg_base, $user_sid)
$reg_value_mask = "Image{0}"
If ((Test-Path -Path $reg_key) -eq $false) { New-Item -Path $reg_key }

#save images, set reg keys
ForEach ($size in $image_sizes)
{
#create hidden directory, if it doesn't exist
$dir = $image_base + "\" + $user_sid
If ((Test-Path -Path $dir) -eq $false) { $(mkdir $dir).Attributes = "Hidden" }

#save photo to disk, overwrite existing files
$file_name = ([string]::format($image_mask, $size))
$pathtmp = $dir + "\_" + $file_name
$path = $dir + "\" + $file_name
Write-Verbose " saving: $file_name"
$user_photo | Set-Content -Path $pathtmp -Encoding Byte -Force
ResizeImage $pathtmp $size $size $path
Remove-Item $pathtmp

#save the path in registry, overwrite existing entries
$name = [string]::format($reg_value_mask, $size)
$value = New-ItemProperty -Path $reg_key -Name $name -Value $path -Force
}

Write-Verbose "Done."
} else { Write-Error "No photo found in Active Directory for $env:username" }
gpupdate /force
Add manual AD profile pictures
-
Download adext.dll-master.zip
-
Extract the .dll from adext.dll-master.zip in c:\ (like this: c:\AdExt.dll)
-
cmd
- The path may differ depending on the version of .Net Framework installed.
cd %WinDir%\Microsoft.NET\Framework64\v4.0.30319 && InstallUtil.exe c:\AdExt.dll
Check the NET Framework with the following command
For 64-bit .NET Framework:
reg query "HKEY_LOCAL_MACHINE\SOFTWARE\Microsoft\NET Framework Setup\NDP\v4\Full" /v InstallPath
For 32-bit .NET Framework:
reg query "HKEY_LOCAL_MACHINE\SOFTWARE\Wow6432Node\Microsoft\NET Framework Setup\NDP\v4\Full" /v InstallPath
If you want to uninstall AdExt run the following command:
cd %WinDir%\Microsoft.NET\Framework64\v4.0.30319 InstallUtil.exe /u c:\AdExt.dll
Install Azure Stack HCI
This has been tested on Azure Stack HCI version 23H2
Step 1 Run on DC (Domain Controller)
Install-Module AsHciADArtifactsPreCreationTool -Repository PSGallery -Force
New-HciAdObjectsPreCreation -Deploy -AzureStackLCMUserCredential (Get-Credential) -AsHciOUName "OU=aszcss01,OU=Applications,OU=Groups,OU=itgoit,OU=02-Organizations,DC=arcadeparty,DC=lan" -AsHciPhysicalNodeList @("ASZCSS01-S1-N01") -DomainFQDN "arcadeparty.lan" -AsHciClusterName "ASZCSS01-cl" -AsHciDeploymentPrefix "ASZCSS01"
When asking Do you want PowerShellGet to install and import the NuGet provider now?, enter: Y (Yes)
Create credentials
Username: aszcss01
Password: aszcss01
Step 2 Run on each Azure Stack server
In Welcome to Azure Stack HCI cmd, enter: 15 Exit to command line (PowerShell)
Enable-WindowsOptionalFeature -Online -FeatureName Microsoft-Hyper-V -All
winrm quickconfig
netsh advfirewall firewall add rule name="ICMP Allow incoming V4 echo request" protocol=icmpv4:8,any dir=in action=allow
restart-computer
When asking Do you want to restart the computer to complete this operation now?, enter: N (No)
When asking Make these changes? enter: Y (Yes)
#Install Arc registration script from PSGallery
Install-Module AzsHCI.ARCinstaller

#Install required PowerShell modules in your node for registration
Install-Module Az.Accounts -Force
Install-Module Az.ConnectedMachine -Force
Install-Module Az.Resources -Force
When asking Are you sure you want to install the modules from PSGallery? enter: A (Yes to All)
#Define the subscription where you want to register your server as Arc device
$Subscription = "YourSubscriptionID"

#Define the resource group where you want to register your server as Arc device
$RG = "ASZCSS01-Resources"

#Define the tenant you will use to register your server as Arc device
$Tenant = "YourTenantID"

#Connect to your Azure account and Subscription
Connect-AzAccount -SubscriptionId $Subscription -TenantId $Tenant -DeviceCode
Go to https://microsoft.com/devicelogin and enter code you got from the console
#Get the Access Token for the registration
$ARMtoken = (Get-AzAccessToken).Token

#Get the Account ID for the registration
$id = (Get-AzContext).Account.Id

#Invoke the registration script. For this release, eastus and westeurope regions are supported.
Invoke-AzStackHciArcInitialization -SubscriptionID $Subscription -ResourceGroup $RG -TenantID $Tenant -Region eastus -Cloud "AzureCloud" -ArmAccessToken $ARMtoken -AccountID $id
Go to https://portal.azure.com/#view/Microsoft_Azure_HybridCompute/AzureArcCenterBlade/~/hci
Click on Deploy cluster (Preview)
Resource group: ASZCSS01-Resources
Cluster name: ASZCSS01-cl
Region: (US) East US
Click on Create a new key vault
Key vault name: aszcss01-cl-hcikv-2311
Click on Create
Recommended Software
Visual Studio Code
Extensions
-
Material Icon Theme: https://marketplace.visualstudio.com/items?itemName=PKief.material-icon-theme
-
Docker: https://marketplace.visualstudio.com/items?itemName=ms-azuretools.vscode-docker
-
Terraform: https://marketplace.visualstudio.com/items?itemName=4ops.terraform
-
Packer: https://marketplace.visualstudio.com/items?itemName=HashiCorp.HCL
-
Prettier: https://marketplace.visualstudio.com/items?itemName=esbenp.prettier-vscode
-
Remote SSH: https://marketplace.visualstudio.com/items?itemName=ms-vscode-remote.remote-ssh
-
THEME: Ayu https://marketplace.visualstudio.com/items?itemName=teabyii.ayu
MobaXterm
Everything
Firefox
Extensions
-
Material Icons for Github: https://addons.mozilla.org/en-US/firefox/addon/material-icons-for-github/
-
Decentraleyes: https://addons.mozilla.org/en-US/firefox/addon/decentraleyes
-
uBlock Origin: https://addons.mozilla.org/en-US/firefox/addon/ublock-origin/
-
Dark Reader: https://addons.mozilla.org/en-US/firefox/addon/darkreader/
-
Return YouTube Dislike: https://addons.mozilla.org/en-US/firefox/addon/return-youtube-dislikes/
-
Stylus: https://addons.mozilla.org/en-US/firefox/addon/styl-us/
-
Tampermonkey: https://addons.mozilla.org/en-US/firefox/addon/tampermonkey/
Install WSL with Ubuntu & Mount Linux Drives (ext4)
This guide allows you to natively mount, view, and copy files from a physical Linux
ext4hard drive directly inside Windows 10 / Windows 11 without formatting it first.
Storage Warning
Make sure your destination Windows drive has enough free space to hold your Linux files before copying. If copying Terabytes of data, it is highly recommended to use an external USB HDD.
Install WSL (Windows Subsystem for Linux)
You do not need to open the Microsoft Store manually. The command below will automatically download and install the default Ubuntu distribution from the Microsoft Store.
-
Right-click the Windows Start menu and open Terminal (Admin) or Windows PowerShell (Admin).
-
Run the following command to install WSL and Ubuntu:
wsl --install
-
Restart your computer. The Virtual Machine Platform requires a reboot to activate.
-
After rebooting, a terminal window will automatically open saying "Installing, this may take a few minutes..." Let it finish.
-
It will prompt you to create a UNIX username and password. (This does not need to match your Windows credentials). Once you see the green command prompt (e.g.,
user@hostname:~$), WSL is installed. Close the window.
Identify the Linux Drive and Partition
-
Open Windows PowerShell (Admin).
-
Run the following command to list all physical drives and find your Linux drive (Look for the size to identify it):
Get-CimInstance Win32_DiskDrive | Select-Object Model, DeviceID, Size
Note the DeviceID of your Linux drive (Example:
\\.\PHYSICALDRIVE1)
- Run the following command to find the partition containing your data. Replace
1with the DiskNumber you found in the previous step:
Get-Partition -DiskNumber 1
Look for the partition with the largest size (e.g., 3.64 TB). Note the PartitionNumber (Usually
1or2). The Type will say "Unknown", which is normal for ext4 in Windows.
Mount the Linux Drive
- In the same Administrator PowerShell, run the mount command. Replace
PHYSICALDRIVE1and--partition 1with your specific details:
wsl --mount \\.\PHYSICALDRIVE1 --partition 1
- If successful, it will return: "The disk was successfully mounted as '/mnt/wsl/PHYSICALDRIVE1p1'."
Copy Files to a Windows Drive
You have two ways to copy the data: via the Windows GUI or the WSL Terminal.
Option A: Windows File Explorer (Easier)
- Open standard Windows File Explorer.
- Click inside the top address bar, paste the following path, and press Enter:
\\wsl.localhost\Ubuntu\mnt\wsl\
- Open the
PHYSICALDRIVE1p1folder. You will see all your Linux files. - Open a second File Explorer window to your destination drive (e.g., your
D:orG:drive) and simply drag-and-drop the folders over.
Option B: Terminal using rsync (Best for Massive Transfers)
Windows File Explorer can freeze when transferring Terabytes of data or folders with strict Linux permissions (like Docker containers). Using
rsyncvia the WSL terminal is much safer and can be resumed if interrupted.
- Open your Ubuntu app from the Windows Start menu.
- Your Windows drives are automatically mounted under
/mnt/. (e.g., theC:drive is/mnt/c/, theG:drive is/mnt/g/). - Create a backup folder on your destination Windows drive (Assuming
G:drive):
mkdir /mnt/g/Linux_Backup
- Copy the files using
rsyncwith elevated privileges:
sudo rsync -avP --exclude=lost+found /mnt/wsl/PHYSICALDRIVE1p1/ /mnt/g/Linux_Backup/
Explanation of flags:
-a: Archive mode (preserves permissions and folder structure)
-v: Verbose (shows files as they copy)
-P: Progress (shows transfer speed and allows resuming if interrupted)
Safely Unmount the Drive
Always safely unmount the drive before disconnecting it or formatting it in Windows Disk Management to prevent corruption.
- Open Windows PowerShell (Admin).
- Run the unmount command:
wsl --unmount \\.\PHYSICALDRIVE1
- You can now safely open Disk Management, delete the Linux volume, and format the drive to NTFS if you wish to use it permanently in Windows.